
There are many different methods that are used to successfully incubate ball python eggs. Some breeders allow their females to maternally incubate their eggs. Since we can not provide the proper humidity and temperatures for a successful maternal incubation we choose to artificially incubate our eggs. We will list the the steps we take to successfully hatch our eggs. We are in no way trying to imply or suggest that our way is the only right way. It is just what works for us.
Incubator
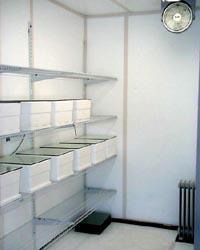
There are a number of different incubators that are available on the market today. The one you choose will depend upon the number of clutches you plan to have and the amount of money you wish to spend. It is possible to use a home made incubator. If you choose to build your own we suggest that you carefully select your heating elements and your controls. Our first incubator was about the size of a small refrigerator. It worked very well for coloubrid eggs. We found that it was too small for the number of python eggs we were going to produce so we built an incubator room. Hovabators are commonly used by people that are only expecting a couple of clutches. One hovabator can only hold one clutch of ball python eggs at a time. Hovabators are generally available at your local feed store. There are also several on-line reptile supply stores that offer them. No matter what you choose to use to incubate your eggs we suggest that you turn it on at least two weeks prior to egg deposition. This will give you time to help stabilze the temperature in the incubator. Ball python eggs can successfully be incubated at temperatures ranging from 88 to 90 degrees.
Medium
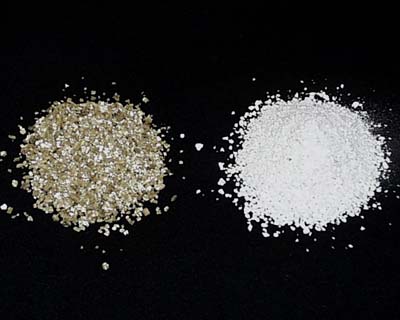
The eggs must be placed in some type of medium for incubation. We use a mixture of Vermiculite and Perlite. Both of these can be purchased at your local Home & Garden Center or Nursery. Some people only use Vermiculite as a medium. We use a 2:1 ratio when mixing them together ie, 2 cups of Vermiculte for every 1 cup of Perlite. The Perlite allows more airfolw around the eggs and keeps the water from soaking the eggs. When choosing the Vermiculite it is IMPORTANT that you do not get the kind that has any soil included. The soil can rot out the bottom of the eggs. Next you need to mix your medium with water. The standard is 50/50 by weight, not volume. The mixture should almost feel dry to the touch. A mixture that is too wet can also cause the eggs to rot. It has been our experience that the neonates absorb more yolk when kept in a dryer medium than those that are hatched from a damp or wet medium. After thoughly mixing your medium pour it into your selected container.
Container
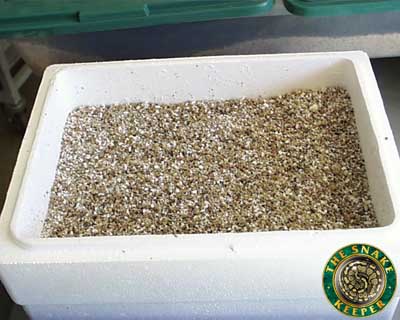
The container you choose to use needs to be able to fit into your incubator and it also needs to be large enough to hold the eggs. Eggs are generally a little bit larger than chicken eggs. This may help you judge the size of the container you wish to use. Plan for a modest size clutch of six. Your snake may lay more, or less eggs than six. This is our completed box with medium. It is now ready for the eggs. It is best to make shallow derpressions where the eggs will rest while incubating. We generally place them down about half way into the medium. We do not bury the eggs in the medium, nor do they need to be rotated. We also use a 1/4 inch glass plate for the lid. This allows us to see inside quickly with out the need to open the top. Once a week or so we "air" out the container. The last two weeks of incubation we ventilate the eggs daily. We recommend that you set up your container in the incubator a few days before you expect your snake to lay her eggs. This will give the medium a chance to develop an even temperature through out. This will also allow you to double check your incubators performance since in an empty incubator the air circulation is different than when it is full.
Egg Removal
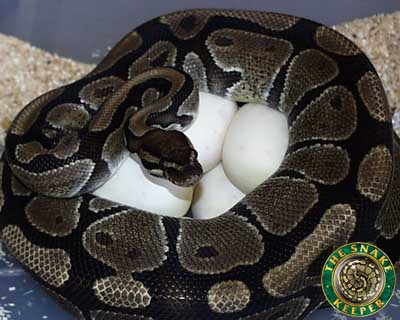
Now comes the fun part! Before removing the eggs from the female try to make sure that she is done laying first. Generally if she is not finished you will be able to detect a large bulge by the vent. This would be the next egg in line to be layed. If she is finished, be very careful taking her off of the clutch. Females can be very protective of their eggs and you may get bitten. We often need to use a snake hook to remove the females from their clutches. You may be able to cover her with a towel or other cloth and gently remove her from her eggs. Take care when doing this. At times they can be coiled quite tightly around their eggs. Place her in a secure area until you are done placing the eggs in the incubator.
Final Step
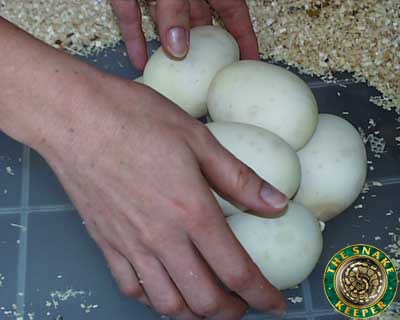
After the snake is removed take a look at the eggs. It is best to determine now if the eggs are fertile or if they are slugs. Fertile eggs, as perviously mentioned, will be white and a little larger than chicken eggs. Slugs will be smaller and yellow in color. Sometimes you will see an egg that has a spot that has not calcified properly. This eggs can hatch. Often times the hatchlings will be smaller from these eggs. After determining which eggs are bad and which are good, carefully remove the fertile eggs and place them in your container. Try not to let the eggs move out of the position that they are in. If they are all stuck together do not attempt to seperate them, unless you have difficulty placing them in your container. Eggs can be seperated, but you do run the risk of rupturing the egg. If you feel you need to seperate your eggs we recommend that you use dental floss. This process may take some time, so be pateint, otherwise do not seperate the eggs. For the egg that has a spot or end that has not properly calcified we recommend that you place this egg in the medium in such a way as to keep the spot or end up out of the medium. This will help reduce the amount of mold that will attack this end of the egg. Sometimes during incubation you will have an egg go bad that is attached to the rest of the clutch. Generally this will not be a problem for the rest of the clutch. If you are concerned about the spread of the mold, take a Q-tip and gently wipe the mold off of the egg. You may need to repeat this process every few days. Cover the top of the container with your lid of choice, we personally prefer glass, since it allows for quick viewing of the eggs. At 89 degrees it takes approximately 60 days for the eggs to hatch. If your temperatures run hotter, they will hatch quicker, if they run cooler they will take longer to hatch. It is important to remember that when eggs are incubated at temperatures other than what is recommend there will be a greater chance for embryos to die in the egg or for the embryos to go full term, but hatch out with deformities.
Finished Container
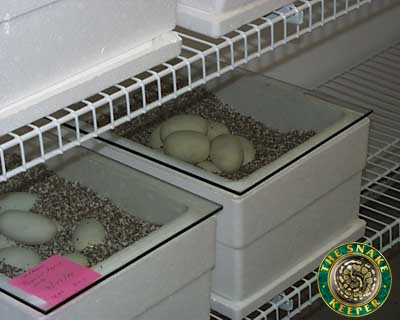
Now your container is finished and ready to be placed in the incubator. You may wish to attach a label to the outside of the incubator that identifies the anticipated hatch date. Eggs generally begin to collapse about two weeks before the hatch date. If your eggs begin to collapse during the first 30 days of incubation, you may wish to check the moisture content of the medium. If it seems to have dried out some carefully add more water. If the eggs do get too dry they will perish. The entire hatching process from first slice until the time the snake emerges takes about 24 hours. Be patient, they will eventually crawl out and begin to explore their new world.
 netviper digital studio